
If you’ve ever driven a tractor across a farm field to prepare soil for planting, or operated heavy construction equipment to level a site before building, chances are you’ve interacted with ductile iron parts—even if you didn’t notice them. As a supplier of these critical components, I get asked all the time: how do we turn raw metal into the strong, durable parts that keep machinery running for decades? It’s not just melting metal and pouring it into a mold; it’s a precise, science-backed process that balances chemistry, heat, and craftsmanship to create a material that’s far more reliable than standard gray iron. Today, I’m breaking down exactly how ductile iron parts are manufactured, step by step, from the raw materials to the finished piece that gets shipped to you.
First, let’s start with the basics for anyone who might be new to the difference between gray iron and ductile iron. Gray iron is the old workhorse of cast metal, but it’s brittle—if you drop it or stress it too hard, it cracks. Ductile iron, on the other hand, has tiny graphite nodules (not the flat flakes found in gray iron) that make it flexible, like a tough metal sponge. That flexibility is why it’s used for everything from disc harrow spools on farms to pump housings in industrial plants. The most important part of creating that graphite structure is getting the chemistry right from the very first step, because if you mess up the mix, the nodules don’t form, and you end up with gray iron instead of ductile iron.
The first stage of manufacturing is melting the base metal, and here’s where most of the quality control starts. We don’t just use scrap metal randomly; we source high-quality pig iron, steel scrap, and alloying elements that are low in impurities like sulfur and phosphorus. Why? Sulfur is the enemy of graphite nodules—if there’s too much sulfur in the melt, it will stop the nodules from forming, turning our ductile iron back into brittle gray iron. Most of our scrap comes from industrial recycling centers that specialize in clean, steel-only scrap, and we test every batch of pig iron for sulfur content before it even goes into the furnace. For melting, we use medium-frequency induction furnaces, which are perfect for consistent, precise heating. These furnaces use electromagnetic induction to heat the metal to around 2,800°F (1,538°C)—hot enough to fully melt all the raw materials into a smooth, liquid metal.
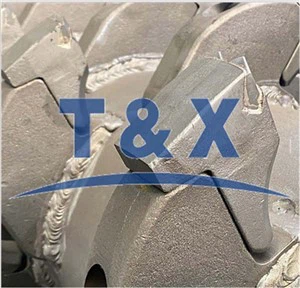
Once the metal is fully melted, we adjust its chemistry to get exactly the right mix. The base melt is mostly iron, but we need to add carbon and silicon to reach the core of ductile iron’s makeup—usually 3.2 to 3.8% carbon and 1.8 to 2.6% silicon by weight. Too little carbon, and the metal will be hard and brittle; too much, and it will form excess graphite that weakens the part. We also add small amounts of manganese to boost strength, and trace amounts of other elements like copper or nickel if we need the part to resist corrosion or handle higher stress. The key here is that every metal supplier will have their own exact formula, based on what the final part needs—for example, a disc harrow spool (you can see a common example of this part here: Grey Iron Or Ductile Iron Disc Harrow Spool) needs to be tough enough to withstand constant friction and soil impact, so our formula for that part has slightly higher manganese than a smaller pump housing.
The next, most critical step that makes ductile iron different from any other cast iron is the nodularization process. This is where we add the element that turns flat graphite flakes into round nodules: magnesium. But magnesium is tricky. If we just dump it into the liquid metal, it will react too quickly and burn off before it can do its job. So we use a “magnesium addition process” called the tundish method, or we pre-treat the metal with a small amount of silicon carbide first to reduce sulfur levels even more, then add a magnesium alloy (usually 5 to 10% magnesium mixed with iron and silicon) into the base of the pouring ladle. We cover the ladle with a flux material (like calcium carbide) to slow down the magnesium reaction, so it dissolves into the metal slowly and evenly. Once we add the magnesium, we let the metal sit for 5 to 10 minutes to let the reaction complete—this is when the graphite starts forming tiny, round nodules. We test a small sample of the metal under a microscope (or use a portable carbon-sulfur analyzer) to make sure the nodule count is right—we need at least 90% of the graphite to be round for true ductile iron. If the nodule count is low, the part will be brittle, so this step is non-negotiable.
After nodularization, we have what’s called “treating the metal” before pouring, which is where inoculation comes in. Inoculation is adding small amounts of elements like ferrosilicon to make sure the graphite nodules stay round when the metal solidifies. Even with magnesium, if the metal cools too fast or has impurities, the nodules can start to form flakes again. Inoculation gives the graphite a stable surface to attach to, so they stay round. We also add a small amount of strontium, which helps with the inoculation process, especially for thinner parts that cool faster. For example, a thin disc harrow spool will cool quicker than a thick pump housing, so we adjust the inoculant level to match the wall thickness of the part.

Now, we’re ready to pour the metal into molds. The mold material is a big choice, because it affects the final part’s surface finish and accuracy. Most of our ductile iron parts use two main molding processes: green sand molding and shell molding. Green sand is the most common for large, simple parts— it’s a mix of sand, clay, water, and additives that’s packed around a pattern to create a mold. It’s cheap and fast for high-volume production, but it’s not as precise as shell molding. Shell molding uses a mixture of sand and a thermoset resin, which is heated to harden into a smooth, rigid shell mold. This is what we use for parts that need tight tolerances, like the disc harrow spool I mentioned earlier—those parts have to fit perfectly onto tractor axles, so the mold has to be accurate down to fractions of a millimeter. Once the mold is made, we pour the molten metal into the mold cavity, and let it solidify slowly. Slow cooling is important because it gives the graphite nodules time to fully form and grow—if you cool the mold too fast, the nodules don’t develop properly, leading to weak parts.
Once the metal is solid, we let the mold cool completely (usually 24 to 48 hours, depending on the part size) before breaking it apart to remove the casting. This is called “shakeout.” For green sand molds, we shake the mold to release the sand, and the casting comes out attached to the “runners” and “risers” — the extra metal that was poured to feed the mold as it cooled. Risers are especially important for ductile iron, because as the metal cools, it shrinks, and if there’s no extra metal in the riser, the part will have voids (called shrinkage cavities) that weaken it. So the first step after shakeout is removing the runners and risers, usually with a bandsaw or a hydraulic saw. For small, precision parts like disc harrow spools, we use a grinder to clean up the cut edges, so there are no rough spots that would interfere with fitting.
After removing the extra metal, we move on to cleaning and finishing the part. Castings are never perfectly smooth right out of the mold—they have leftover sand (called “sand inclusions”), rough edges, and sometimes small surface imperfections. We use a process called shot blasting: we blast the casting with small, high-velocity steel pellets to remove all the leftover sand and smooth the surface. This is also when we do a first visual inspection to look for any major defects—like cracks, holes, or missing sections. Any parts with major defects are set aside for scrap, because even a tiny crack in a disc harrow spool can cause it to fail mid-operation, leading to expensive downtime for the farmer.
Next comes the heat treatment stage, which is what makes ductile iron strong enough to handle heavy use. Most ductile iron parts need a process called “annealing” to adjust their internal structure. After casting, the metal has a brittle, hard structure from the cooling process. Annealing involves heating the part to around 1,650°F (900°C), holding it at that temperature for several hours, then cooling it slowly over another 10 to 20 hours. This process changes the internal structure of the metal, making it less brittle and more ductile, while still keeping its strength. For parts that need even higher strength, we do a process called “normalizing,” which is heating the part to a slightly higher temperature and cooling it in air instead of slowly. Normalized ductile iron is harder and stronger, so it’s used for parts like construction equipment components that have to handle extreme stress. For example, a heavy-duty disc harrow spool might be normalized instead of annealed, because it’s subjected to constant pressure from rotating on the axle.
Once heat treatment is done, we do a full quality inspection to make sure the part meets our standards—and yours. First, we do dimensional testing: we use calipers, micrometers, or coordinate measuring machines (CMM) to check that every part fits the exact specifications. For disc harrow spools, this means checking the inner diameter to make sure it fits the axle perfectly, and the outer diameter to ensure it works with the harrow’s spacing. We also do non-destructive testing (NDT) to check for hidden defects, like internal cracks or voids. The most common NDT method for ductile iron is magnetic particle testing: we apply a magnetic field to the part, then spray a fine iron powder on the surface. If there’s a hidden crack, the powder will line up along it, so we can see it without cutting the part open. We also test for hardness, using a Brinell or Rockwell hardness tester, to make sure the metal is in the right range for its intended use. Finally, many parts get a surface treatment, like painting or powder coating, to protect against corrosion, especially if they’re used in outdoor or agricultural environments.
By this point, the part is ready for packaging and shipping. As a supplier, we know that our customers rely on these parts to keep their operations running, so we take extra care in packaging—we use custom crates for large parts, and protective foam for small ones, to make sure they arrive undamaged. We also keep detailed records of every batch of parts, including the chemistry test results, heat treatment logs, and inspection reports, so if a customer ever has a question about a part, we can pull the exact data for that batch.
If you’re a farmer needing durable disc harrow spools, a construction company needing heavy-duty pump housings, or any other business that relies on ductile iron parts, you know how important it is to work with a supplier that understands the manufacturing process from start to finish. Every step—from choosing the right scrap metal to the final heat treatment—affects how the part will perform, and we don’t cut corners on any of it. If you’re looking for reliable, high-quality ductile iron parts, we’re here to help you find the right components for your needs. Whether you need standard parts or custom-engineered solutions, our team can walk you through the process and make sure you get parts that last.
References
- ASM International. (2019). Ductile Iron Castings: Properties, Processing, and Applications. Materials Park, OH: ASM International.
- Steel Founders’ Society of America. (2021). The Guide to Ductile Iron Manufacturing and Quality Control. Arlington, VA: Steel Founders’ Society of America.
- European Cast Iron Federation. (2020). Ductile Iron: Production, Performance, and Industrial Uses. Brussels: European Cast Iron Federation.