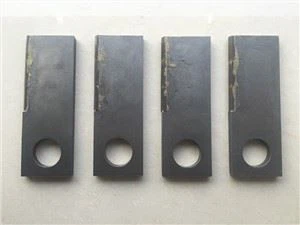

Hey there, fellow stump grinder enthusiasts! I'm a supplier of Stump Grinder Parts, and today I'm gonna walk you through the process of installing a new cutting wheel on a stump grinder. It might seem a bit daunting at first, but with the right steps and a bit of know - how, you'll have that new cutting wheel up and running in no time.
Pre - installation Checks
Before you even start thinking about installing the new cutting wheel, you need to do a few checks. First off, make sure your stump grinder is turned off and completely cooled down. Working on a hot machine can be dangerous, and it's just not worth the risk.
Inspect the area around the cutting wheel. Look for any debris, dirt, or old parts that might be in the way. Clean up the area using a brush or compressed air. This will ensure that the new cutting wheel fits properly and functions as it should.
You'll also want to check the Stump Grinder Bolts that hold the cutting wheel in place. If they're worn out or damaged, it's a good idea to replace them. You don't want the cutting wheel coming loose while you're using the grinder.
Gathering the Necessary Tools
To install the new cutting wheel, you'll need a few tools. Here's a quick list:
- A socket wrench set: You'll need this to remove and install the bolts that hold the cutting wheel.
- A torque wrench: This is important for tightening the bolts to the correct specifications. Over - tightening or under - tightening the bolts can cause problems down the road.
- A safety mask and gloves: Grinding can create a lot of dust, so it's important to protect your lungs and hands.
Removing the Old Cutting Wheel
Once you've done your checks and gathered your tools, it's time to remove the old cutting wheel. Start by using the socket wrench to loosen the bolts that hold the wheel in place. Keep the bolts in a safe place so you don't lose them.
As you're removing the bolts, be careful not to let the cutting wheel fall. It can be heavy, and dropping it could cause damage to the wheel or the grinder. Once all the bolts are removed, gently lift the old cutting wheel off the grinder.
Inspecting the Stump Grinder Pockets
With the old cutting wheel removed, take a close look at the Stump Grinder Pockets. These are the areas where the cutting wheel attaches to the grinder. Make sure they're clean and free of any damage. If you notice any cracks or excessive wear, it might be a good idea to replace the pockets before installing the new cutting wheel.
Installing the New Cutting Wheel
Now it's time to install the new cutting wheel. Carefully place the new wheel onto the grinder, aligning it with the Stump Grinder Pockets. Make sure it sits evenly and securely.
Once the wheel is in place, start inserting the bolts. Don't tighten them all the way just yet. Instead, hand - tighten them to hold the wheel in place. This will make it easier to adjust the wheel if needed.
Tightening the Bolts
After the bolts are hand - tightened, it's time to use the torque wrench. Refer to your stump grinder's manual to find the correct torque specifications for the bolts. Tightening the bolts to the right torque is crucial for the safe and proper operation of the cutting wheel.
Start by tightening each bolt a little bit at a time, going around the wheel in a star pattern. This will ensure that the wheel is evenly tightened and won't wobble during operation. Once all the bolts are tightened to the correct torque, give the wheel a gentle spin to make sure it rotates freely.
Checking the Stump Grinder Teeth
Before you start using the grinder, take a look at the Stump Grinder Teeth. Make sure they're properly installed and in good condition. If any of the teeth are damaged or worn, replace them before using the grinder.


Final Checks
Once you've installed the new cutting wheel and checked the teeth, do a final inspection of the grinder. Make sure all the parts are securely in place and there are no loose bolts or other issues.
Now, you're ready to start using your stump grinder with the new cutting wheel. But remember, always follow the safety guidelines and wear your protective gear.
Why Choose Our Stump Grinder Parts?
As a Stump Grinder Parts supplier, we offer high - quality parts that are designed to fit your grinder perfectly. Our Stump Grinder Bolts, Stump Grinder Pockets, and Stump Grinder Teeth are made from top - notch materials to ensure durability and performance.
If you're in the market for stump grinder parts, whether it's a new cutting wheel or other components, we'd love to hear from you. Contact us to discuss your needs and get a quote. We're here to help you keep your stump grinder running smoothly.
References
- Stump grinder user manuals
- Industry best practices for stump grinder maintenance and part installation